The Roverbot is a very strong robot, equipped with remote control functions. The robot was designed to be controlled using a smartphone.
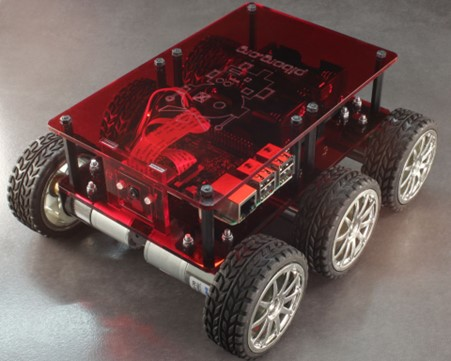
The “RoverBot” robot boasts a versatile feature, with 4-wheel-drive for seamless movement in selected directions.
The Robot’s name “RoverBot ” shows it was designed with versatility and agility in mind. Equipped with key features to excel in Remote control challenges, demonstrating precision, speed and adaptability.
RoverBot Integrates a user-friendly responsive control system with smart phone add-on to allow operators to drive the robot with ease for optimal maneuvering and safe navigation.
BUILDING THE PROJECT
1. Define the Objectives:
For our Remote Controlled Raspberry Pi robot, one of the primary goals is to control the Robot through a Maze (Escape Route) Challenge. The RoverBot uses a Raspberry pi microcontroller, equipped with a high torque DC motor with chassis designed to integrate high-traction wheels for better maneuverability. The Robot is a Four-wheel-drive (4WD) configured to navigate on various terrains.
2. Select the Hardware:
The Raspberry Pi 3 will serve as the brain of our robot due to its accurate processing power in less time. Along with a Raspberry Pi board, we’ll need motor controllers, high torque DC motors, wheels, sensors, smartphone add-on a power supply, and a chassis to build our robot.
The following Hardware components were selected for the development of the RoverboT
- Raspberry Pi 3
- DC Motors – 4
- Wheels – 4
- LN Motor Driver
- 9v Battery Holder and Batteries
- 1860 Battery Holder and Batteries
- Smartphone Add-on(Bluedot)
- Screws and Bolts
- Acrylic Sheet for Chassis
3. Design the Chassis:
For the Chassis that houses all of the components of the robot , we explored various materials such as wood and acrylic material . We decided to adopt the acrylic material for its lightweight and study properties whilst taking into consideration its ability to house accommodate all hardware and weight distribution.
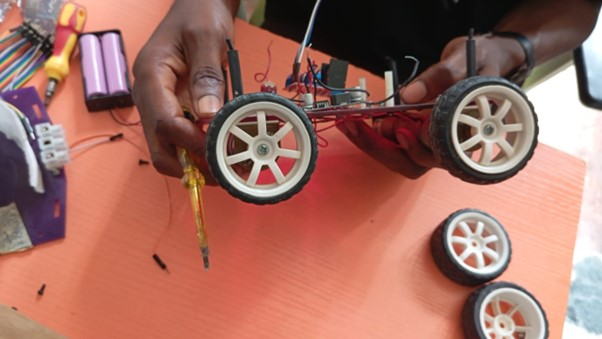
4. Assemble the Hardware:
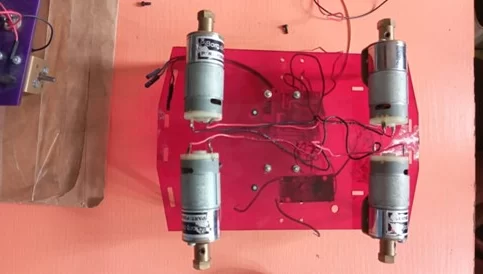
The team agreed on a standard flatbed 4 wheeled design for seamless manoeuvrability, after the design was finalized, it was time to assemble the hardware components. This involves mounting the Raspberry Pi, motor controllers, motors, and sensors onto the chassis according to the design specifications. Careful attention was given to wiring and connections to ensure reliability.
From both sides of the DC motors, we connected the motors to the motor driver and tested it separately Also, all 4 motors and wires connected appropriately.
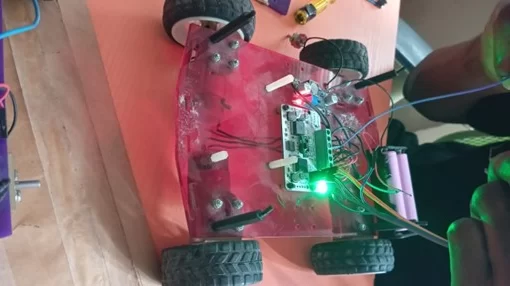

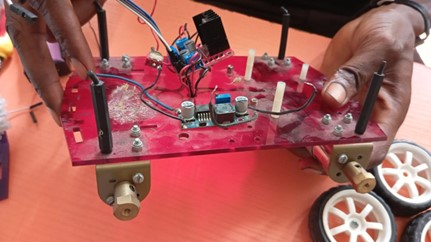
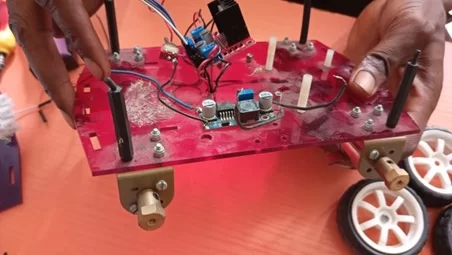
After putting together Roverbot, we added a power-pack to test its basic functions like moving forward and backward before installing different sensors.
Testing is really important to find and solve any problems. We began with simple tests to check if the motors and communication with the Raspberry Pi are working right. Then, we made the tests more tasking by checking Raspberry Pi functions and connecting it to a smartphone for remote control.
Corona Beta Robot – Video Link for Submission: