For the Lava Palava Challenge, the Ekobot is being designed to navigate the path autonomously using sensors (Ultrasonic, IR) to sense path, detect obstacles whilst navigating the lava pathway.
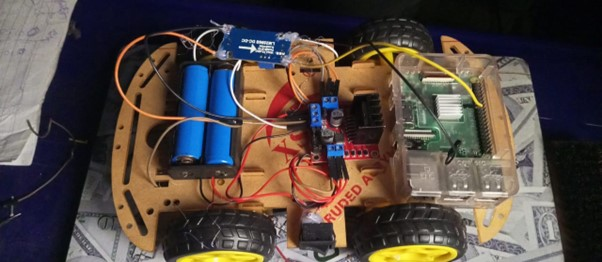
The “EkoBot” robot boasts a versatile and robust mobility feature, with 4-wheel-drive for seamless movement in selected directions. These functionalities drove the decision on hardware selection to achieve robust mobility and versatility.
Equipped with Raspberry pi 3 microcontroller and sensors for obstacle detection and path sensing, Ekobot can autonomously detect and navigate around obstacles, enhancing its safety and operational efficiency. Ekobot will be equipped with features to switch between autonomous and remote control functionality. The EkoBot represents the culmination of our team’s expertise, innovation, and relentless dedication.
EkoBot boasts a modular construction, allowing for rapid customization and adaptation to various competition challenges. It features an acrylic material chassis with all-terrain wheels, enabling it to navigate various environments.
CREATING OUR PROJECT
1. Define the Objectives:
Every successful robotics project starts with a clear set of objectives. For our autonomous Raspberry Pi robot, the primary goal is to navigate through the Lava Palava path seamlessly while avoiding the edge of the track and achieving successful turns at predefined angles. The Secondary objectives for the Robot includes speed, accuracy, maneuverability and robustness
2. Select the Hardware:
The Raspberry Pi 3 will serve as the brain of our robot due to its versatility and affordability. Along with a Raspberry Pi board, we’ll need motor controllers, motors, wheels, sensors (such as ultrasonic sensors or cameras), power supply, and a chassis to build our robot
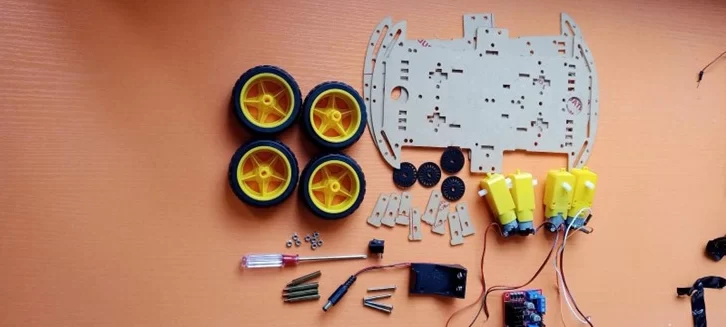
The following Hardware components were selected for the development of the Ekobot
- Raspberry Pi 3
- DC Motors – 4
- Wheels – 4
- LN Motor Driver
- 9v Battery Holder and Batteries
- 1860 Battery Holder and Batteries
- Ultrasonic Sensors
- Screws and Bolts
- Acrylic Sheet for Chassis
3. Design the Chassis:
The Chassis houses all of the components of the robot. We explored various materials such as wood and acrylic material. We decided to adopt the acrylic material for its lightweight properties whilst taking into consideration its ability to accommodate all hardware and weight distribution.
4. Assemble the Hardware:
Once the design is finalized, it’s time to assemble the hardware components. This involves mounting the Raspberry Pi, motor controllers, motors, and sensors onto the chassis according to the design specifications. Careful attention was given to wiring and connections to ensure reliability.
We Connected the velocity wheels to the motors and repeated for all for motors as shown below:
We secured the 4 DC motors to the acrylic chassis and fixed all 4 wheels into the four motor axes properly.
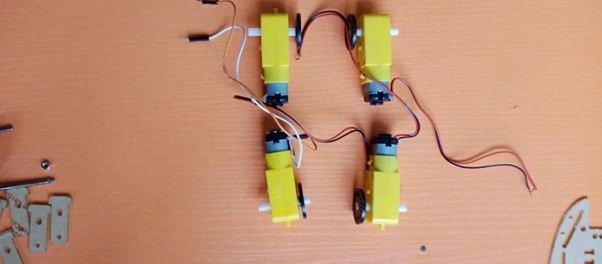
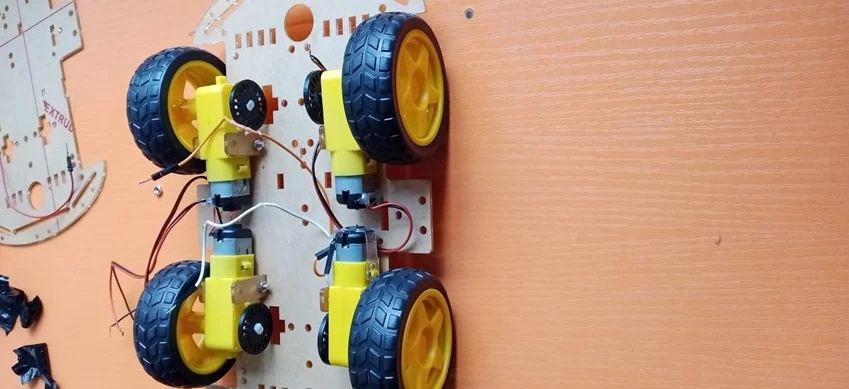
From both sides of the DC motors, we connected red wires of two motors together and black wires of the same motors together. Also, if you are using different colors of wires on the motors, make sure you determine the direction of rotations and join the wires that give the same direction of rotations.
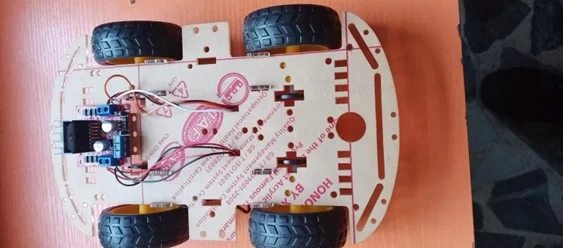
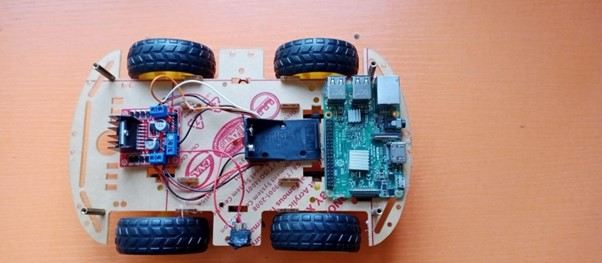
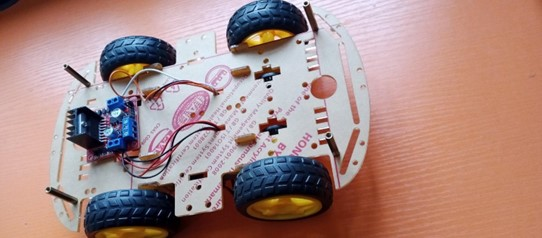
We used a glue gun to properly fix the raspberry pi to the acrylic chassis and Connect the positive of the switch to 5V of the motor driver and the negative (black wire) to GND.
After assembling Ekobot a powerpack was attached for testing of basic functionality such as forward and backward movement before adding the sensors.
Testing is a crucial step in the development process, to identify and fix any issues. We started with basic functionality tests to ensure that the motors and communication with the Raspberry Pi are working correctly. Then, gradually increase the complexity of the tests to check sensors, evaluate navigation and obstacle avoidance capabilities.
SUBMISSION LINKS:
Corona Alpha Robot – Video Link for Submission:

